You are here: 5. Job Costing > 5.6. PLANT + MAINTENANCE Menu: Micronet Plant Maintenance > 5.6.5. Plant + Maintenance - Schedule Job Cards > 5.6.5.4. Managing Jobs > Assigning Jobs to Employees by Job Number
Assigning Jobs to Employees by Job Number

This topic explains how to use the MPM Job Scheduler to assign jobs to employees by job number.


Technical Tip

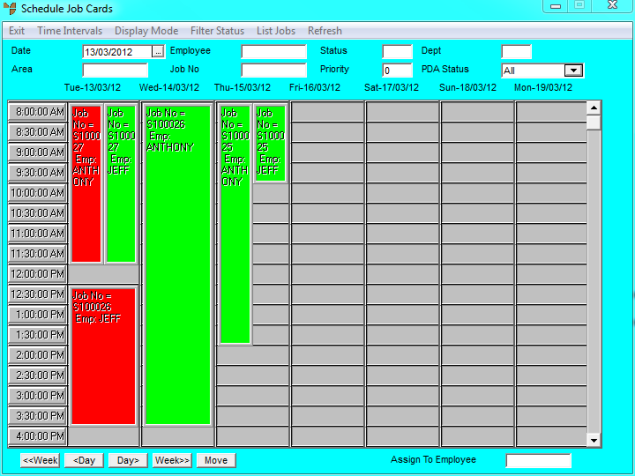
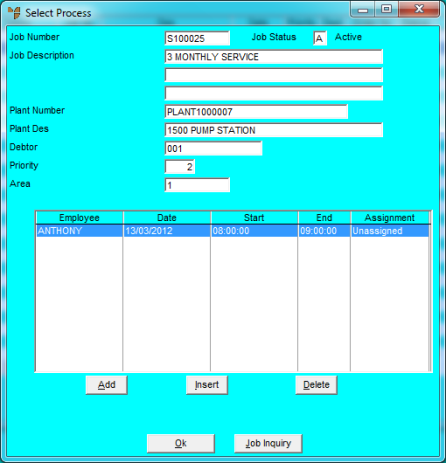
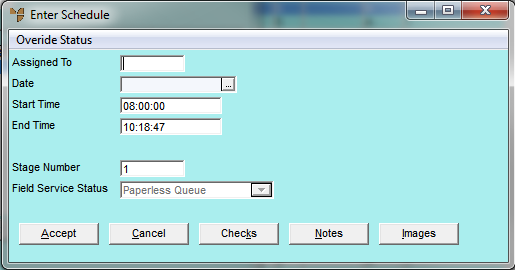
You can also assign employees to jobs using:

  1. Open the Job Scheduler.

Refer to "Accessing the Job Scheduler".

Micronet displays the Schedule Job Cards screen with the display preferences you last saved, and showing any jobs for the current date.

  1. Select LIST JOBS.

Micronet displays the Job Listing screen.

  1. Double click on the job you want to assign, or select the job and press the Enter key.

Micronet displays the Select Process screen.

This screen displays the following information:


Field

Value


Job Number

The job number.


Job Description

The job description.


Plant Number

The number of any plant item used on the job.


Plant Des

The description of any plant item used on the job.


Debtor

The customer for this job.


Priority

The priority code for this job, e.g. normal or urgent.


Area

The job area this job is assigned to.


Technical Tip

To inquire on the job details, select the Job Inquiry button and then select the output for the inquiry (e.g. printer or screen). Micronet prints or displays the Job Transaction Inquiry. For more information on this inquiry, refer to "Job Inquiry - Inquiry - Transaction".

  1. If you want to:

Micronet displays the Enter Schedule screen.

  1. Complete the following fields:


Field

Value


Assigned To

Enter the ID of the employee you want to assign this job to. You can also press spacebar then Enter to select from a list of employees.

For field service jobs, the job will be downloaded to this employee's PDA.


Date

Enter or select the date the employee should perform this job.


Start Time

Enter the job start time for the employee.


End Time

Enter the job end time for the employee.


Assignment

Select the job assignment status. Options are:

  • Unassigned - the job has not yet been assigned to an employee
  • Assigned - the job has been assigned to an employee
  • PDA - the job assignment has been sent to a PDA
  • Completed - the job assignment has been completed
  • Response - this option is not used.


Technical Tip

If your company uses the Field Service module, use the Field Service Status rather than the Assignment field.


Stage Number

Micronet displays the default job stage number. You can delete this and press Enter to select a different job stage against which to record this job assignment.


Field Service Status

This field is only displayed if your company uses the Field Service module. For more information about Field Service, refer to "Introduction to Micronet Job Costing".

Micronet displays the status of the field service job. You can change the status if required. Options are:

  • No Action - save the job without sending it to the field service employee in the Assigned To field
  • Send to PDA - send the job to the field service employee selected in the Assigned To field. Micronet will download the job to the PDA the next time the PDA user synchronises with Micronet.
  • On PDA - the job has been downloaded to the field service employee's PDA but not yet started
  • On PDA Edited - the job has been edited in Micronet since the job was downloaded to the PDA and requires the PDA user to download the job again to update the job with the latest changes
  • In Progress on PDA - the job has been downloaded to the field service employee's PDA and is currently in progress
  • New Job - this status is not currently used
  • Quote Required - this status is not currently used
  • Quote Retrieved - this status is not currently used
  • Completed on PDA - the job has been completed by the field service employee but not yet synchronised to MJC
  • Completed - the job has been completed by the field service employee and has been synchronised to MJC.
  1. If you are editing an existing job assignment, you can:
  1. When you have finished maintaining the job assignment, select the Accept button.

If you selected to add a job assignment, Micronet redisplays the Enter Schedule screen so you can add further job assignments.

  1. When you have finished maintaining job assignments, select the Cancel button.

Micronet redisplays the Select Process screen showing all assignments for the job.

  1. Select the Ok button.

Micronet redisplays the Job Listing screen.

  1. Repeat the steps above to add or edit job assignments for other jobs if required.
  2. When you have finished, select the Ok button on the Job Listing screen.

Micronet redisplays the Schedule Job Cards screen.